


This article describes the installation of Gogs on a Qnap NAS, along with Adminer and PostgreSQL. The reason for writing this article is that it took me a long time to get things working. Hopefully the below will help the reader save some time.
Project overview
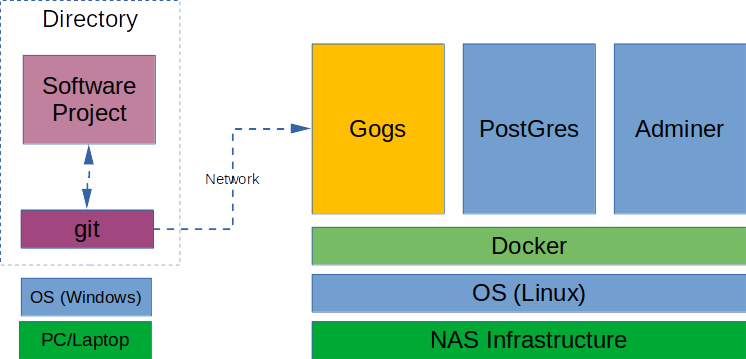
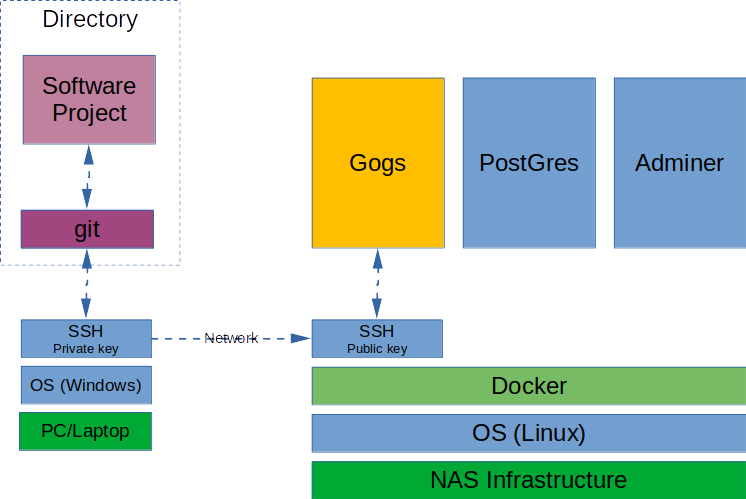
The aim of this project is to build a Git server running in a Docker container. And we store the data from Gogs in a separate PostgreSQL database. Optionally, the database can be managed via Adminer.
So, we’re going to push any git managed software project to Gogs over the own network (which is fast!). That way, we create a backup as well.
What is git?
Git is the most widely used version control system for software. Git keeps track of all software changes so you can always see exactly what has been implemented. Plus, you can go back to previous versions. Git also makes collaboration easier, by aggregating multiple people’s changes into a single source. So whether or not you work in a team, Git is useful for all software developers.
What is Docker?
There is nothing wrong with installing a program for a specific purpose on your computer or NAS. But some programs are not meant to run in your operating system, for example, a Linux program in MS Windows. In such cases, containers are very useful. A container contains an application that is shielded from its environment, but still uses the operating system it runs in. You can start the container, stop it or simply throw it away; the operating system just stays clean. These are important pluses for a NAS, because you can quickly stop and start a service this way. The most common platform used to create containers is Docker and is installed by default in QNAP and Synology NAS appliances.
What is Gogs?
Gogs is the abbreviation of ‘Go Git Service’ and is a self-hosted Git service. Collaborative programmers are used to posting their projects on GitHub or GitLab. And as long as those projects are not too big, that’s fine, especially if everyone is allowed to see those projects. When working with large files or when you don’t want everyone looking over your shoulder, setting up your own Git server can be an option.
What is PostgreSQL?
To store the git-data of this project we use a database. Gogs can handle several databases like MySql and SQLite3. We choose PostgreSQL as it is fast, small and open source.
What is Adminer?
Adminer is a database management tool running in a web browser. It is a replacement for the well-known phpMyAdmin. Adminer is added out of curiosity, what does the database actually look like? It can be omitted if you wish.
Scope
In scope of this project is the installation and an example of the project. But in-depth information about git, Docker, Gogs, PostgreSQL and Adminer is out of scope.
Installation
The installation consists of three parts:
- Installing Container Station in the NAS.
- creating a user, able to writing files in the NAS. This is not a user which should to login on the NAS, but is only used by the containers.
- creating Docker containers in the NAS.
Container Station
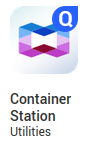
To run containers on a QNAP NAS, you need Container Station. If Container Station is not installed in the NAS, you can do so via the App Center in the Dashboard:
It will create a location where it will store its containers, remember this location. Default it is called ‘Containers’ and you can see it in QNAP File Station.
Container user creation
To do something in a NAS, you’ve to login. The same applies to a container, so we’ve to create a new user which is able to read and write in the directories where the containers resist. You can read in your documentation how to create a new user (Control Panel > Users). In this project the name ‘gogs‘ is used.
Every user has an unique UID and is part of a group with a GID. To easily find out which ID’s belong to your user it is best to login in the NAS via SSH. To enable SSH on the NAS:
1. Log in to the NAS as administrator.
2. Go to Control Panel > Network & File Services > Telnet / SSH.
3. Select Allow SSH connection (Only administrators can login remotely.).
4. Optional: Do not change the port number (22) as the project will use another (222).
Click Apply.
From your device you should be able to login on your NAS via a terminal in Linux or in Windows (in search, type ‘cmd’ and press enter). Now, connect with the NAS (where user is the administrator name used):

When logged in, type:
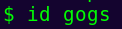
This displays the UID and the GID which you need later:

Folder creation
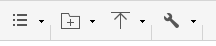
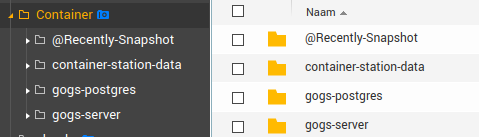
Gogs and the database need some storage. In QNAP File Station, locate and select the Container folder. Then create two new folders by pressing the ‘+’-button:
In this project the names ‘gogs-postgres‘ and ‘gogs-server‘ are created. The result looks like this:
After creating both folders you need to provide your user access to them. Locate your user and click the ‘Edit permissions for shared folders’ button:

Check the ‘RW’ box of ‘Container’.
Container creation
Several containers communicating with each other is called an application in Docker Compose. A Docker application is build with a Compose configuration file. This is a YAML file defining services, networks, and volumes.
In Container Station a Docker application can be created as well. There are two versions of Container Station:
- QNAP Container Station 2: on the menu select ‘Create’, then click ‘Create Application’.
- QNAP Container Station 3: on the menu select ‘Applications’, then click ‘Create’.
Give the application a name, for example ‘Gogs‘. There is a default yaml template, remove all lines:

Copy/paste the Docker Compose code listed below in the empty template:
version: "3"

networks:
  gogs:
    external: false

services:
  server:
    image: gogs/gogs:latest
    container_name: gogs
    environment:
      - USER_UID=1004
      - USER_GID=100
      - GOGS__database__DB_TYPE=postgres
      - GOGS__database__HOST=db:5432
      - GOGS__database__NAME=gogs
      - GOGS__database__USER=gogs
      - GOGS__database__PASSWD=gogs
    restart: always
    networks:
      - gogs
    volumes:
      - /share/Container/gogs-server:/data
      - /etc/timezone:/etc/timezone:ro
      - /etc/localtime:/etc/localtime:ro
    ports:
      - "3000:3000"
      # 222 outgoing used because of qnaps ssh server on port 22
      - "222:22"
    depends_on:
      - db

  adminer:
    image: adminer:latest
    restart: always
    networks:
      - gogs
    ports:
      - "5000:8080"
    depends_on:
      - db
    environment:
      ADMINER_DEFAULT_SERVER: postgresql
      ADMINER_DEFAULT_DB_HOST: db
      ADMINER_DEFAULT_DB_NAME: gogs
      ADMINER_PASSWORD: gogs
      ADMINER_DESIGN: rmsoft

  db:
    image: postgres
    restart: always
    environment:
      - POSTGRES_USER=gogs
      - POSTGRES_PASSWORD=gogs
      - POSTGRES_DB=gogs
    networks:
      - gogs
    ports:
      - "5432:5432"
    volumes:
      - /share/Container/gogs-postgres:/var/lib/postgresql/data
If you don´t want Adminer installed, copy/paste code below which will create only Gogs and database containers:
version: "3"

networks:
  gogs:
    external: false

services:
  server:
    image: gogs/gogs:latest
    container_name: gogs
    environment:
      - USER_UID=1004
      - USER_GID=100
      - GOGS__database__DB_TYPE=postgres
      - GOGS__database__HOST=db:5432
      - GOGS__database__NAME=gogs
      - GOGS__database__USER=gogs
      - GOGS__database__PASSWD=gogs
    restart: always
    networks:
      - gogs
    volumes:
      - /share/Container/gogs-server:/data
      - /etc/timezone:/etc/timezone:ro
      - /etc/localtime:/etc/localtime:ro
    ports:
      - "3000:3000"
      # 222 outgoing used because of qnaps ssh server on port 22
      - "222:22"
    depends_on:
      - db

  db:
    image: postgres
    restart: always
    environment:
      - POSTGRES_USER=gogs
      - POSTGRES_PASSWORD=gogs
      - POSTGRES_DB=gogs
    networks:
      - gogs
    ports:
      - "5432:5432"
    volumes:
      - /share/Container/gogs-postgres:/var/lib/postgresql/data
Code explanation
The configuration file consists of two parts, networks and services. The services part consists of three containers:
- server, this is the Gogs container.
- adminer, a container for database administration (optional).
- db, the container with a PostgreSQL database.
Look at the server environment rules and change the USER_UID and the USER_GID into the numbers of your user. If you have used other folder names you must change them in the volumes section of server and db as well.
Click Validate YAML to verify if the code is correct. Press the ‘Create’ button. Container Station will download the Docker Containers from Docker Hub (where a lot of pre-build containers resist) and creates an application.
When done you’ll see a new App in Container Station overview:

When you click on the ‘⏵’, the app’s three containers open:
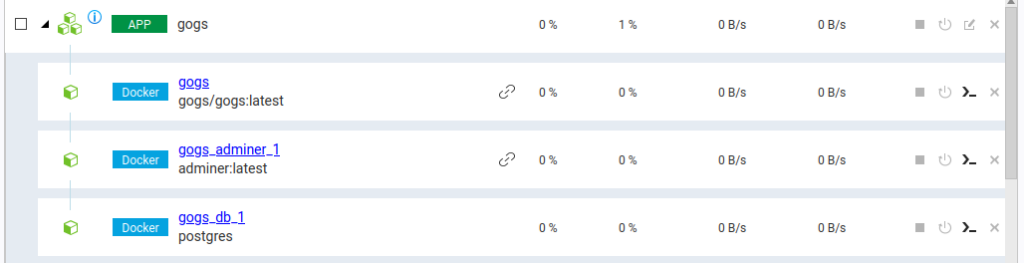
The ‘⏹’ at the end of each line means that the containers are running. As they are greyed out you can stop them by selecting the app:

Now you can stop and start the app with the buttons above the app overview:

Configuring Gogs
When the containers are running, you can connect with Gogs in two ways:
- In a browser by entering: http://<ip-of-your-NAS>:3000
- Clicking on ‘🔗’ in the container overview will open a new tab in your browser.
When opening Gogs for the first time, a setup screen appears. Some of the fields are filled in already, but not all of them correctly. Host must be changed as we’re running Gogs in a Docker container (where we named the database db, see Docker compose code above). And domain is not localhost but IP of your NAS. Check following example list carefully:
| Item | Value |
|---|---|
| Database-type | PostgreSQL |
| Host | db:5432 |
| Username | gogs |
| Password | gogs |
| Database name | gogs |
| Schema | public |
| SSL modus | Disable |
| Application name | Gogs |
| Repositories base directory | /data/git/gitstore |
| Executive username | git |
| Domain | <your NAS address> for example: 192.168.178.200 |
| SSH port | 222 (as 22 is used already by NAS) |
| HTTP port | 3000 |
| Application URL | <http://<NAS address>:3000/> for example: http://192.168.178.200:3000/ |
| Log path | /app/gogs/log |
| Default Branch | Master |
| Optional: | |
| SMTP host | for example Gmail: smtp.gmail.com:587 |
| Receiver | <you>@gmail.com |
| Receiver email | <you>@gmail.com |
| Password | <secret> |
| Admin account: | <admin name> (not your NAS admin!) |
| Password | <secret> |
| Verify password | <secret> |
| Admin email | <you>@gmail.com |
When list is filled in, press the ‘Install Gogs’ button.
Create new user
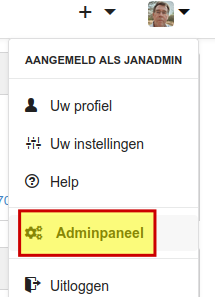
Create a separate account for each Gogs user. Click on the dropdown button next to your login icon and choose ‘Admin panel’:
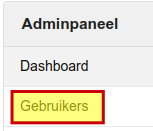
In ‘Admin panel’ choose ‘Users’ (‘Gebruikers’ in Dutch):
Create a new user here with button ‘Create new account’ (Dutch image is shown):
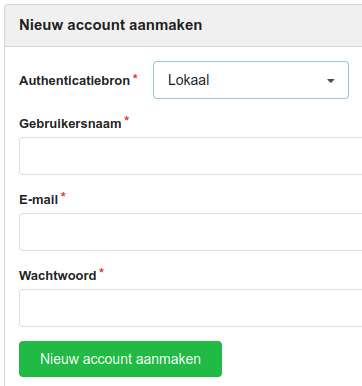
Each user needs an unique email address as this is used to identify users via SSH, see chapter below.
Configuring SSH
However it is possible to use Gogs with http, it is more secure to connect with the NAS and with the containers inside via ssh. This protocol works with a private key (stored in your pc or laptop) and a public key (stored in the NAS Container directory). So, every time you connect with Gogs your ssh-keys are being checked:
Create an SSH key pair in your terminal (on windows, you maybe need to install git for windows first and open git bash):
$ ssh-keygen -t ed25519 -C "you@gmail.com"The ‘ed25519’ option is currently the most commonly used encryption protocol and more secure than RSA. It is important you fill in same email as used when logged in.
During key generation some questions will be asked. When you’re prompted to “Enter a file in which to save the key”, you can press Enter to accept the default file location. And optional you can enter a passphrase, create a simple one and store it somewhere as you sometimes need it.
Now it is time to enter the public key in Gogs. Login into Gogs (your NAS admin account will do) and find your profile in the upper right corner of the screen:

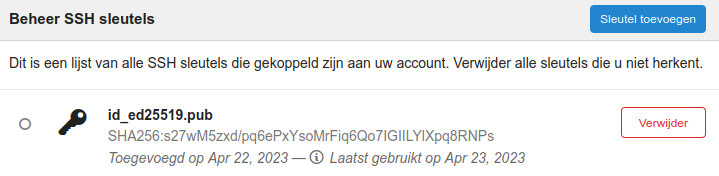
Click on it and choose ‘Your settings’. At the left side in settings, choose SSH-keys and click ‘Add key’. Give it same name as your public key and paste the public key contents. When done, press ‘Add key’ and your key is added (Dutch version is showed here):
Create new repository
We have spent a lot of time so far configuring Gogs. Now it is time to actually use Gogs! As far as I know it is not possible to create a new repository in Gogs via git, you only can connect with an existing one.
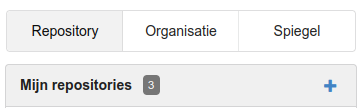
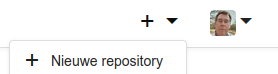
To create a new repository as a user, login into Gogs and the dashboard will appear. Here a new repository can be created by clicking the ‘+’ button:
As an admin, you can remove repositories of users too by clicking the bucket icon:

Click the ‘+’ button as described above or click the ‘+´ button next to your name:
Create a new directory, for example with name ’test’:
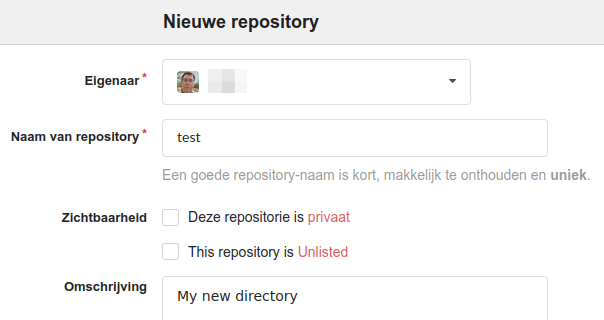
After clicking the create button a new window with a default message is shown. The section ‘Create a new repository from the console’ describes all the necessary steps you need to use this repository with git.
Working with git
On your MS Windows (in Git for Windows) or Linux device open a terminal anywhere in your home directory. Create a new directory:
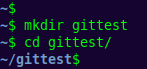
In it we perform the steps mentioned in the default Gogs message. With ’touch README.md’ an empty markdown file is created. And ‘git init’ is the first command to start git doing version control in this directory:

Check with ‘ls -la’ what is created so far:
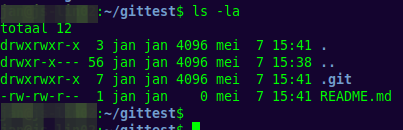
A hidden directory .git is created and the empty README file. If you open the .git directory (cd .git) you’ll see some files and directories:
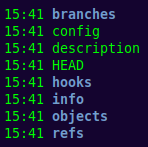
As git will maintain this directory you don´t have to do anything here. With ‘cd ..’ you can switch back to the parent directory. Open the README.md file with any text editor, for example Notepad in Windows. In Linux any text editor will do, I mostly work with ReText which is available in a lot of Linux distributions. Copy/paste the following example:
## Project Test

#### Author: Me, myself and I

#### Aim: demonstrate markdown language

Create a list:

 1. Project one
 2. Project two

### Create a new repository from console:

    touch README.md
    git init
    git add README.md
    git commit -m "first commit"
    git remote add origin ssh://git@192.168.178.200:222/Jan/test.git
    git push -u origin master

### Push an existing repository from console:

    git remote add origin ssh://git@192.168.178.200:222/Jan/test.git
    git push -u origin master
Take a look in this cheat sheet to understand the markdown structure. When you’re done save the file and open your terminal.
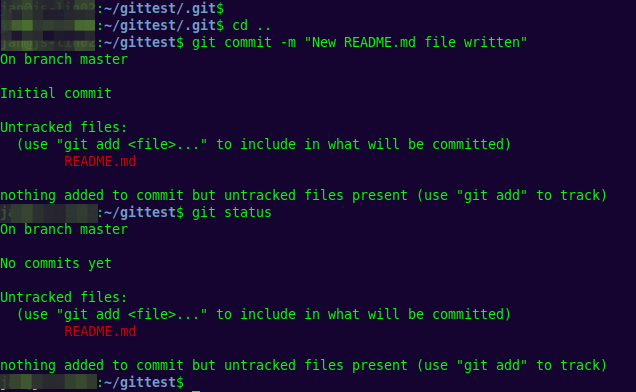
Oops, I made an error. I tried to commit my change without adding the new file first. With ‘git status’ you see no commits are done. So:
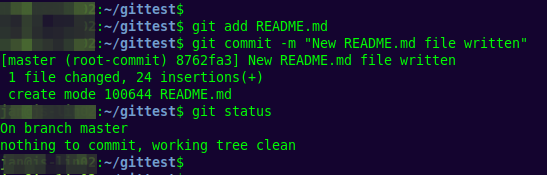
This looks better, we’re ready now to push the new file to our Gogs repository. To do so, we first must to tell git where this repository exists. In this example you need to replace the IP with the IP of your NAS and ‘USER’ with your user name you created in chapter ‘Create new user‘:

You can check if this command was successful:

And finally we can upload our file:
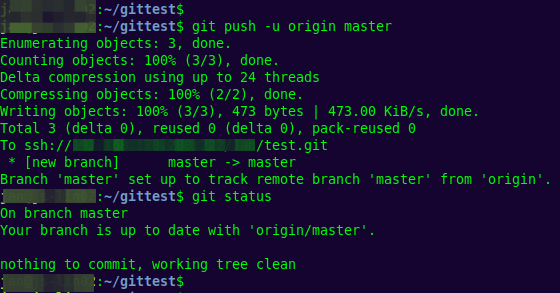
If not already done, log into Gogs and the new file will be displayed:
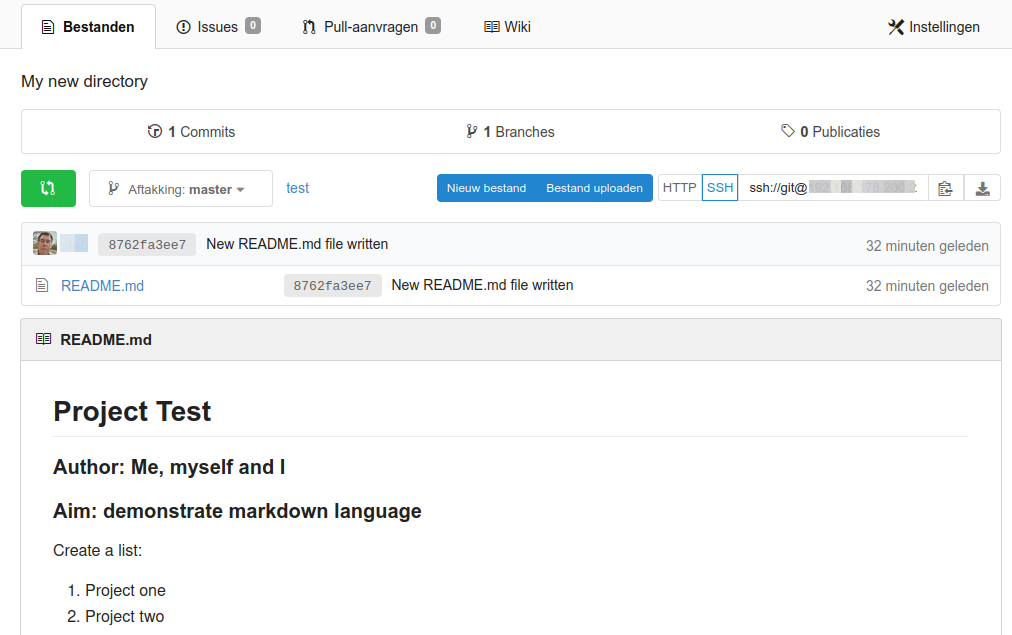
Ready!
If you have arrived here, hopefully you have a working Gogs application running in QNAP NAS.